
How to Speed Up Your WordPress Website (in just 5 steps)-By Website Learner
(00:00) Hi guys Today, we’re going to see how you can speed up your wordpress website Let’s say you have a website, And when someone opens your site, it takes a long time to open and your users are forced to wait for each page to load. Now what if you want to speed up your site and make it load faster, you can do that by watching this video.
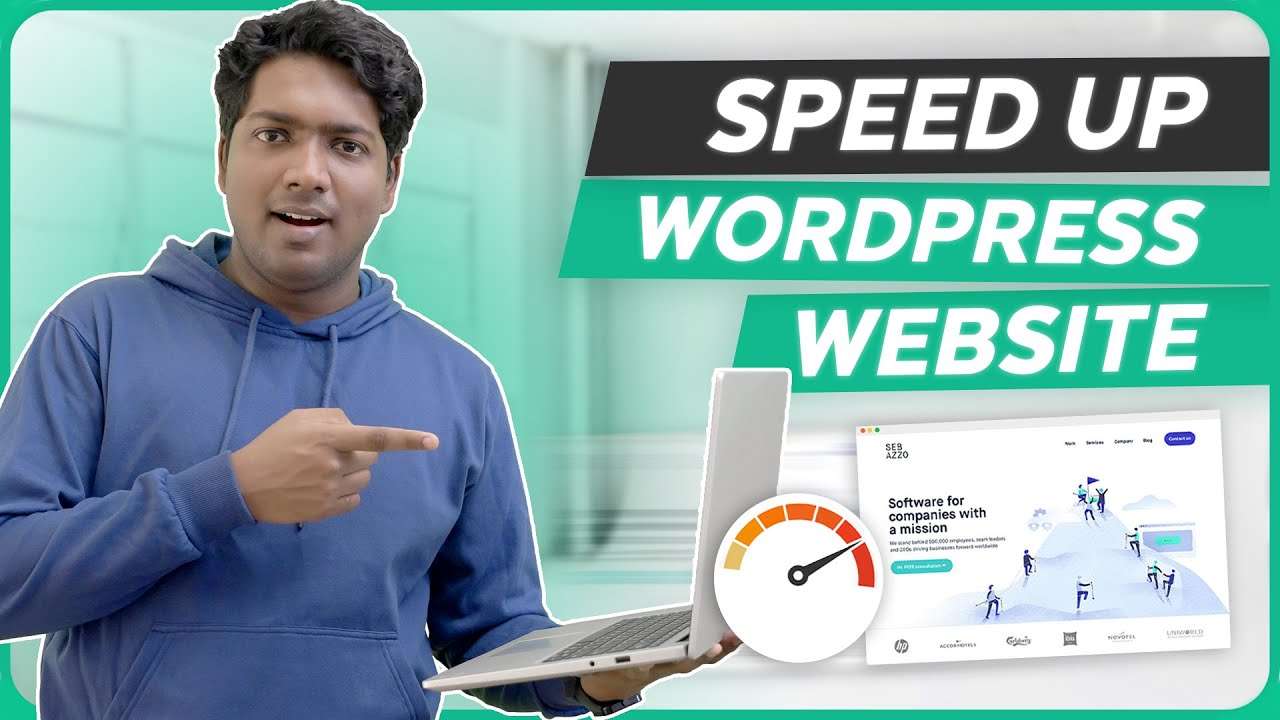
(00:20) So after watching this video, you will be able to, increase the speed your site, by upto 2 times it’s current speed and when a visitor opens your site Your site will load quickly and all your pages will load faster. Now, having a fast website is very important because if your site is slow, your visitors might leave your site and you might also lose revenue.
(00:40) Now, if you have a fast website, there is more chance for your site to get ranked on Google and you’ll get more traffic. Okay So in this video, we’re going to see different ways in which you can speed up your website. And we will compare the before and after speed of our website and see how our site performs.
(00:57) Okay. I’m Bryan from Website learners and let’s get started first. Let’s see our site. So here it is. Now to speed up our site first, let’s check the speed of our website. So to do that, just click the link below this video, and it will take you to this page. This is the site which will help us to check the speed of our website.
(01:21) So to check it, you need to enter the URL of your site here. So let’s go to our site copy this URL, and then paste it here. Now if we click ‘test’ You can see that we have got the load time of our website The load time indicates how long it takes for your website to completely load When a visitor opens your site.
(01:59) here you can see that we have the load time as 3.0s, This means our site takes 3.0s to load completely. Okay. Now, you know the speed of our site next. Let’s see how you can increase the speed up your site. So to speed up your site, We’re going to see 4 different ways. The first way is to reduce the size of images on your website.
(02:21) Now when someone visits our site, The site will take time to load all the images on our site and then display them. So in order to make our site load faster, we need to reduce the size of our images. And here you can see that we have the page size Page size is the size of a page on our website. Now, if we reduce the size of our images, our page size will also be reduced and our site will load faster.
(02:45) Okay. Next, let’s see how you can reduce the size of images on your site. So to reduce the size of images, First let’s note down these results We will need this later while comparing the speed of our site once you’re done, let’s go to our site. Now, to check the size of an image Just right-click on the image and click inspect.
(03:17) Here You can see that we have got the link of the image Now If you go here you can see the size of the image. Okay. Now, to reduce the size of images. First. We need to install a plugin in WordPress. So to install, the plugin, let’s go to our WordPress dashboard. Now go to plugins Add click new Now here, search for WP Optimize’ And you will get this plugin..
(03:54) this is the plugin, which will help us to reduce the image size. So to install the plugin, let’s click install and then click ‘Activate’ So now we have successfully installed the plugin. and you can see that we have a new item called ‘WP-Optimize’. Once you have installed the plugin. Now to reduce the size of the images.
(04:20) Click ‘WP-Optimize’ Now click images. And, here you can see that we have got all the images on our site. Now to reduce the size of images, Just enable this option, click ‘select all’ And then click ‘compress the selected images’ Now as soon as you click compress, the size of your images will be reduced.
(04:57) So to check that, let’s go back to our site and click ‘refresh’ Now right-click on an image click ‘inspect’ Now If you go here you can see that the size of the image has been reduced. Okay. Now if we go to the site, you can see that this was our load time before reducing the size of the images. Now let’s again test the speed of our site And we have got the load time And page size of our site.
(05:43) Now If we check with our previous results, you can see that our load time and page size has been reduced. This means our site will load faster than before. So this is how you can reduce the size of images on your site. Okay. So now we have successfully reduced the size of images on your site. Once you’re done.
(06:02) Now, let’s say you want to add more images to your site And whenever you add an image you want to automatically reduce the size of the images. How do we do that? So now let’s see how you can automatically reduce the size of new images to do that. Let’s go to our dashboard. Now here you can see that we have an option called automatically compress newly added images.
(06:25) so let’s enable it. Now, whenever you add a new image, the size of the image will be reduced automatically. Okay. So this is how you can reduce the size of the images on your site. Next, let’s go to 2nd way to speed up our website, which is to enable page cache on our site. First, let’s see how the cache works Now when someone visits your site, it takes time for your hosting provider to bring theat data on your site to your visitor, So it will take time for our site to load.
(06:56) Once you enable cache a copy of our website, data will be saved in wordpress.. And when a customer visits your site, the copy of the data will be sent to your visitor, And our site will load faster. Okay. Now Let’s see how you can enable cache on your site So to enable cache on your site let’s go to our dashboard here you can see that we have an option called cache let’s click here And enable this option.
(07:28) Okay. So we have now successfully enabled page caching. once you’re done, let’s check the speed of our site. So let’s go to this tab And click test, As you can see, we have got the result. Now, if we check our previous results, you can see that this was our previous load time. And after enabling page cache you can see that the load time has been reduced.
(07:28) Okay. So we have now successfully enabled page caching. once you’re done, let’s check the speed of our site. So let’s go to this tab And click test, As you can see, we have got the result. Now, if we check our previous results, you can see that this was our previous load time. And after enabling page cache you can see that the load time has been reduced.
(07:56) So this means our site will now load faster. Okay. So this is how you can enable page cache on your website. Next, Let’s go to the 3rd way to speed up our website, which is to use good hosting for your website. The hosting company of your site plays an important role in the speed of your site to understand this first, let’s see, what is the hosting server? A hosting server is a place where all the data of your site will be stored.
(07:56) So this means our site will now load faster. Okay. So this is how you can enable page cache on your website. Next, Let’s go to the 3rd way to speed up our website, which is to use good hosting for your website. The hosting company of your site plays an important role in the speed of your site to understand this first, let’s see, what is the hosting server? A hosting server is a place where all the data of your site will be stored.
(08:24) So when someone opens your website, all your data from the server will be given to the visitor. Now, if you have a high-performance server, Your site will load faster, And your data will reach your customers quickly. So it is important to choose a good hosting server, which will load your site faster. We, recommend you to use WebSpacekit hosting.
(08:24) So when someone opens your website, all your data from the server will be given to the visitor. Now, if you have a high-performance server, Your site will load faster, And your data will reach your customers quickly. So it is important to choose a good hosting server, which will load your site faster. We, recommend you to use WebSpacekit hosting.
(08:43) as it has, high-performance servers and your site will load faster. Now, if you want to host your website on WebSpaceKit, you can do that by watching this video. Okay. Once you choose a good hosting company, it is also very important to select the hosting server, which is closest to your visitors. Now, let’s say your server is in the USA, and your visitors are in India Now, if they try to open your site, it’ll take more time for the data to reach them from your server.
(08:43) as it has, high-performance servers and your site will load faster. Now, if you want to host your website on WebSpaceKit, you can do that by watching this video. Okay. Once you choose a good hosting company, it is also very important to select the hosting server, which is closest to your visitors. Now, let’s say your server is in the USA, and your visitors are in India Now, if they try to open your site, it’ll take more time for the data to reach them from your server.
(09:07) So your site will take a longer time to load. Now, if you select your server in India, when your visitors open your site, it’ll load much faster. So in order to load your site much faster, make sure you select the server, which is nearest to your visitors. Now If you see here, our location has been selected as India.
(09:26) So if we click here And change the location to USA, And click test. You can see that the load time has increased for this location. This means our site takes longer to load in USA. Now, if you change the location again, you can see the load time is different. This is because our server is not located at these places.
(09:59) Since I have my visitors in India, I have selected my server in, India. So If I change the location to India, you can see that our site loads much faster And also the data will reach the visitor quickly So make sure you select the server that is placed near to your visitors. Okay. Next let’s go to the final way to speed up your site which is to use CDN.
(10:28) Now, let’s see what is CDN CDN is known as content delivery network. It is a group of servers, which is available anywhere around the world. Just like your hosting server CDN can be used to store your website data. As we saw earlier, if your visitors are far away from your server, it’ll take longer for your site to load.
(10:49) So instead of this, if you connect your site with CDN, which is available all across the world, a copy of your website data will be stored in the CDN servers. And if a visitor opens your site, your website data will be taken from the nearest CDN, which makes your site load faster. Okay. So this is how the CDN works.
(11:07) Now Let’s see how you can to add your site to CDN We’re going to do 3 steps. The first step is to create an account on Cloudflare So to create an, account on Cloudflare let’s open a new tab And then go to cloudflare.com. This is the site that is going to help us to add our site to CDN. Now click ‘signup’ here enter your email address and a password, And then click create account.
(11:52) Okay! Once you’ve created the account, we can now go to step 2 which is to connect your website, to Cloudflare So to connect your site to cloudflare First, you need to add your site to this cloudflare account. So to add your site, click add site’ Now here, you need to enter your website’s URL. So to get the URL, let’s go to our site.
(12:20) Copy this URL Go back to cloudflare and paste it here Now click ‘add site’ And it will take you to this page here You need to choose a plan for your account. I’m going to select this free plan. Click ‘continue’ Now again, click ‘continue’ Okay! We have now successfully added our site to the cloudflare account.
(13:06) Once you’ve done that you will get these details. Now, in order to connect your site to cloudflare you need to add these details to your hosting account. So to add these details, let’s go to our hosting account, Now as I have my site hosted with GoDaddy, I’m going to go there, So let’s go to GoDaddy.
(13:30) so to sign in let’s click here And then login to your account Now, to add the details Just click DNS and it will take you to this page. Now scroll down, Click ‘change’ and then click enter my own name server Now, here you need to copy these details and paste it here first let’s copy this and paste it here Then copy this, And paste it here Now Click ‘save’ Once you’ve added these details
(14:38) Let’s go back to CloudFlare. Now click, ‘check nameservers’ then click ‘get started’ And it will take you to this page, Now to connect your site to cloudflare you need to complete these steps Now, here it will ask you to configure your domain settings. So to configure your domain, click save Now, to secure your connection with https Just enable this option and click save.
(15:19) Now again, click save and click save again. Once you’ve done that Finally click finish. Now to check if the name servers are changed. let’s click ‘check nameservers And you will get this message. Now if you refresh here here you can see that we got this message which means we have now successfully connect our site to cloudflare Now if you don’t see this message immediately try refreshing after sometime Okay! Once you’ve done next.
(16:00) We need to verify our email. So to verify our email, let’s go to our inbox. As you can see, we have received an email from Cloudflare, Let’s open it Now to verify our email Just click, this link, and as you can see, our email has been successfully verified. Once you’ve verified your email. We can now go to the final step of adding our site to CDN Which is to install Cloudflare plugin in WordPress.
(16:35) This is the plugin., which is going to help us connect our Cloudflare account with our website So to install the plugin, let’s go to our dashboard, And then go to plugins And click ‘add new’ now search for cloudflare and you will get this plugin So to install this plugin, Just click ‘install’ and then click activate.
(17:14) So we have now successfully installed the plugin.. Once you have installed the plugin. Now to connect our account, just click settings Now, here it will ask you to sign in to your CloudFlare account. So to sign in lets click here And then enter your email address Now, here you need to enter an API key, So to get the key, Just click here, And it’ll take you to our cloudflare account.
(17:49) Now, to get the key Click ‘API tokens’ and click ‘view’ here you can see that we have now got the API key, So let’s copy it. Then go back to this tab And paste it here. Now click ‘save’ Okay. so now we have now successfully added our website to CDN And our site will load faster from anywhere around the world.
(18:32) So to check that, let’s go to this tab, Now, this is the previous load time of our site in India. And If we click ‘test’ You can see that the load time has been reduced and now our site loads faster. Okay. Now let’s check the load time by changing the location to do that. Just click here. Now, if we select USA, you can see that our load time is lesser than before.
(19:09) So this means our site will load faster from anywhere around the world. Okay, this is how you can add CDN to speed up your site. So that’s it guys Now, you know the different ways to speed up your site, now if you want to know the advanced way to speed up the website you can get our course by clicking this link Also make sure you click this subscribe button to see more videos from us.
(19:33) So thanks for watching,, I’ll see you in the next video. Take care Bye-bye.
How useful was this post?
Click on a star to rate it!
Average rating 0 / 5. Vote count: 0
No votes so far! Be the first to rate this post.
We are sorry that this post was not useful for you!
Let us improve this post!
Tell us how we can improve this post?


Who is Karnadhar? Unveiling the Faces Behind SBI and the Electoral Bond Scam

Google Core and Spam March Update 2024 – AI Blogging News

What to Save and Spend on a ₹25,000 Salary? | Sagar Sinha Motivational Video

Earn ₹3000 to ₹5000 Daily | Part-Time Work | FD Return | Sagar Sinha

Business Mastery Series: Episode 41 | Sandeep Maheshwari | Hindi

Is India Heading Towards Dictatorship? Insights from Chandigarh Elections and Farmers’ Protests | Dhruv Rathee

To Buy or Rent a Home: Understanding Property Essentials | Sagar Sinha Motivational Video

The Money Wisdom I Learned in My Hard Times | Money Management Tips | Sagar Sinha

Price Action Trading For Beginners देसी भाषा में | Price Action Analysis | Trading | SAGAR SINHA

Ram Mandir: The Untold Truth about Ram’s Exile | Dhruv Rathee

अयोध्या राम मंदिर – आखिर राम हनुमान आ ही गए! Amazing Facts About Ayodhya Ram Mandir

22 January सज गई पूरी अयोध्या | ayodhya ram mandir vlog |ayodhya new vlog |rammandir pran pratishtha

नई अयोध्या | Ayodhya Documentary | all tourist places | Research on Ramayana | History of Ayodhya

रामलला देंगें भारत की Economy को संजीवनी ? | Ram Mandir | Rahul Malodia

How Ram Mandir is Transforming Ayodhya

रामलला का वनवास हुआ पूरा | Ram Mandir Ayodhya | Sonu Sharma

How will Ram Mandir make UP No.1? पैसा, नौकरी, उद्योग सब सैकड़ों गुना | Dr Ujjwal Patni #ayodhya

पूरे Ayodhya का भव्य नजारा पहली बार किसी कैमरे पर Manish Kashyap ने NMF News के माध्यम से दिखाया

अयोध्या राम मंदिर किस Topic पर Video Viral करे || Top 12 Trending Topic Ideas on Ayodhya Ram Mandir

अयोध्या में मोदी जी का भारी अपमान?गुजरात वाली 108 फीट का अगरबत्ती मंदिर में नही जलेगा?
Ayodhya dharmpath marg latest update/Ayodhya rammandir pran pratishtha/22जनवरी2024 प्राण प्रतिष्ठा

Ayodhya में प्रज्वलित की गई 108 फीट लंबी अगरबत्ती! 21 दिन तक पूरे अयोध्या को महकाएगी

First Look Of Ayodhya Ram Mandir From Inside | राम मंदिर के प्रथम दर्शन | Ram Mandir Pran Pratishtha

Ayodhya में Babri मस्जिद तोड़ने का एक-एक मिनट का प्लान ऐसे बना? Ram Mandir | Yogi | Narendra Modi

राम मंदिर पर आर्मी के युवाओं ने राम मंदिर पर किया ऐसा ऐलान! || Loksabha election 2024

राम मंदिर के उद्घाटन को लेकर गोदी मीडिया से भिड़े मोहित शर्मा

राम मंदिर उद्धघाटन से पहले भड़के ब्राह्मण | 2024 मोदी चूक जाएंगे ? Loksabha Election | Rahul Gandhi

Ram Rajya After Ram Mandir? (Or Same Same) | #pranpratistha | Akash Banerjee

Ayodhya Ram Mandir Trap/SCAM | VIP PASS | Prashaad at Home Delivery

Ram Mandir Darshan: Witness the Divine Beauty | Jai Shree Ram 🚩🙏

राम मंदिर से होगा अब Creators को Earning और Growth का फायदा || Top 5 Content Related to Ram Mandir

अधूरे मंदिर का उद्घाटन गलत | Modi पर भारी पड़े 4 शंकराचार्य | Analysis by Pragya Mishra

श्री राम नगरी मनीष कश्यप LIVE ।। मंदिर से कैसे क्षेत्र का विकास होता है एक बार अयोध्या आकर देखें

Ayodhya Ram Mandir: Hansraj Raghuwanshi का ये गीत आपको भी सुनना चाहिए | R Bharat

अचानक अयोध्या पहुंचा सैकड़ो गिद्धों का झुंड ,जटायु देख चौंकी दुनिया | Group Of Vulture In Ayodhya

किसे हो रही है Ram Mandir से परेशानी? | Tejasvi Yadav | Jitendra Awhad | Rj Raunac

Ayodhya Ram Mandir History | अयोध्या विवाद की पूरी कहानी| Ram Mandir Inauguration | RJ Raunac

Business Mastery Series: Episode 41 | Sandeep Maheshwari | Hindi

Join the Startup Community with Sandeep Maheshwari | Applications Open Now!

EP 40 of 100 – Business Mastery Series | By Sandeep Maheshwari | Hindi

The Most Practical Advice by Sandeep Maheshwari | Inspirational Speech in Hindi

Share Market SCAM Exposed by Sandeep Maheshwari | Beware of Fake Stock Trading Courses | Hindi

आगे बढ़ना सीखो | Keep Moving Forward | Sandeep Maheshwari

Smart Investment Choices: Safeguard Your Wealth and Future | Best Investment Tips by Sagar Sinha

Who is Karnadhar? Unveiling the Faces Behind SBI and the Electoral Bond Scam

Google Core and Spam March Update 2024 – AI Blogging News

What to Save and Spend on a ₹25,000 Salary? | Sagar Sinha Motivational Video

Earn ₹3000 to ₹5000 Daily | Part-Time Work | FD Return | Sagar Sinha

Business Mastery Series: Episode 41 | Sandeep Maheshwari | Hindi

Is India Heading Towards Dictatorship? Insights from Chandigarh Elections and Farmers’ Protests | Dhruv Rathee

To Buy or Rent a Home: Understanding Property Essentials | Sagar Sinha Motivational Video

The Money Wisdom I Learned in My Hard Times | Money Management Tips | Sagar Sinha

Price Action Trading For Beginners देसी भाषा में | Price Action Analysis | Trading | SAGAR SINHA

Struggling Leads to Success | How to Become Rich | Sagar Sinha Motivational Video

The Importance of Having Goals | Sagar Sinha Motivational Video 2024

The Secret of Wealthy People | 90% People Don’t Know | How to Become Rich | Sagar Sinha

छोटी सी मिठाई की दुकान से बना डाली भारत की सबसे बड़ी Private University | LPU | The Sonu Sharma Show

How Two Bihar Skill Creators Achieved Millions of Subscribers on YouTube | Featuring Sanjay Sir

How I Turned ₹10,000 Monthly into ₹10 Million Daily Earnings | Becoming Rich in Any Field Ft. @coachbsr

One STUPID Mistake that DESTROYED PayTM | Case Study | Dhruv Rathee

The Truth about Feminism | Is Feminism Destroying Indian Society? | Dhruv Rathee

50% of Indians will get this Disease! | The Next Pandemic | Dhruv Rathee

Budget 2024 Analysis | What did Middle Class get? | Dhruv Rathee

Shiv Khera – Success, Failures, Ram Mandir and Network Marketing | The Sonu Sharma Show EP 4

500 रुपए का SIP बना देगा करोड़पति | Sagar Sinha | SIP Video 2024

The Father of ETFs: Smart Beta ETF Live Demo | Low Risk, High Return | Sagar Sinha

Transform Your Home into a Lucrative YouTube Channel | Raja Rani on Shark Tank India

Freedom from Job in 2024 | Job Vs Business | Sagar Sinha Motivational Video

Make Money from Home | 12% Return Since Last Year | Earn Money at Home | Sagar Sinha

The Secret of Marwadi Success | Motivational Video by Sagar Sinha in 2024

Become Wealthy and Gain Respect | How to Get Rich in 2024 | Sagar Sinha Motivational video

Earn Money With Credit Cards | How to Make Money with Credit Cards | Sagar Sinha Motivation

Paytm vs RBI: A Business Case Study by Rahul Malodia

Join the Startup Community with Sandeep Maheshwari | Applications Open Now!

EP 40 of 100 – Business Mastery Series | By Sandeep Maheshwari | Hindi

Master the Art of Wealth Creation | Share Market for Beginners | Sonu Sharma

5 Habits of the World’s Top 500 Successful People | Best Motivational Video 2024 | Sonu Sharma

Earn Money with Apps: Best Earning App for 2024 | Online Paisa Kaise Kamaye

Unlock Your Earning Potential: ₹1Lakh, ₹2Lakh, ₹3Lakh on YouTube! Must-Watch Guide for New Creators

Earn ₹25 Lakhs in Just 1 Month! How to Make Money from Website | Blogging Guide

Make Money with Your Facebook Profile: The 100% Correct Method | Facebook Payout Account Setup

Urgent Appeal 🙏: Jail for Those Who Commit Atrocities Against 2-Year-Old Child

Youtube Earning Revealed, How to Make Money from Youtube, How Much You Can Earn From Youtube

सुन लो कैसे बनाते हैं महिलाओं को ठगी का शिकार | online scam | Cyber Crime Exposed

The Most Practical Advice by Sandeep Maheshwari | Inspirational Speech in Hindi

Share Market SCAM Exposed by Sandeep Maheshwari | Beware of Fake Stock Trading Courses | Hindi

Earn ₹1500 Daily from Instagram | How to Make Money with Reels | Instagram Earning Tips

Top 5 Freelancing Skills To Earn ₹1000 Daily | Best Work From Home Skills for Earning

Earn ₹2,000/Day with Video Editing | How to Make Money as a Video Editor | Video Editor Career Guide

How to Earn Riches by Taking Loans | Tips to Become Wealthy by Borrowing Money – 2024
Boost Your Views by 100% with These Settings 🔥 | How to Use YT Studio 🤔 | YT Studio Settings

Get Your Video Viral Instantly! Best Wireless Mic For YouTube

Earn ₹2 Crore from 1 Video! 🔴 Live Proof Twitter Monetization | How to Make Money on Twitter

Earn Money Online with Live Proof! ₹50 per Video View 💰| Best Earning App 2024

😭कम Views वालो रोना-धोना बंद करो लाखों Views आयेंगे 🤩| Views Kaise Badhaye

कैसे करते है Youtuber के साथ fraud || Biggest Scam on Youtube || Scam Exposed 😱

How To Start Youtube Channel In 2024 – Complete Detail || Earn ₹1000 Per Day Through Youtube Channel

Paise Kamane Wala App✅ | Online Paise kaise kamaye 2024 | Best Earning App ! Earn money online

1 Car Rating = ₹100 | Give Car Rental Reviews and Earn Rs.5000 Daily | Car Rating Scam on Telegram

अपनी औक़ात कैसे बनाये || Powerful Motivation Video Ft. Shashish Kumar Tiwari

Ram Mandir: The Untold Truth about Ram’s Exile | Dhruv Rathee

पैसों का एक पेड़ लगाओ | 10 Ways to Earn from Youtube in 2024, How to Make Money on Youtube

46 लाख की साइबर ठगी, अमेरिका की पुलिस बनकर साइबर ठगों ने बनाया शिकार

जो मन करे वो करो Channel Grow करो | Which One Is Best Private Job or Youtube | Job Vs Youtube 2024

कैसे किया लाखो कि Earning 1 Channel से || How To Grow Jewellery Youtube Channel Ft.@manjukushwaha

😱 रातों रात Viral 🔥500K Subscriber | Shabnam Shaikh @ShabnamShaikhNews ! Muslim Girl Paidal Yatra

🤩Link Copy-Paste करके ₹30,000/Month कमाए | Amazon Se Paise Kaise Kamaye | Amazon Affiliate Program

1000 Subscriber हर रोज बढ़ेगा 100% गारंटी ! Subscriber Kaise Badhaye ? ! Subscribe Kaise Badhaye ?

आगे बढ़ना सीखो | Keep Moving Forward | Sandeep Maheshwari

अयोध्या राम मंदिर – आखिर राम हनुमान आ ही गए! Amazing Facts About Ayodhya Ram Mandir

Bollywood Movie Upload कर के कैसे होती है Earning || Bollywood Movie Channel Complete Case Study

🤴1 करोड़ Youtube से कमाने का ✅ Full Plan 100% Working ! YouTube 2024

गरीबों के लिए सबसे अच्छा माइक🤞Best Wireless Mic For YouTube | Best Mic For YouTube | Wireless Mic

22 January सज गई पूरी अयोध्या | ayodhya ram mandir vlog |ayodhya new vlog |rammandir pran pratishtha

नई अयोध्या | Ayodhya Documentary | all tourist places | Research on Ramayana | History of Ayodhya

रामलला देंगें भारत की Economy को संजीवनी ? | Ram Mandir | Rahul Malodia

Mystery of Subhas Chandra Bose’s Death | Gumnami Baba | Dhruv Rathee

How Ram Mandir is Transforming Ayodhya

रामलला का वनवास हुआ पूरा | Ram Mandir Ayodhya | Sonu Sharma

How will Ram Mandir make UP No.1? पैसा, नौकरी, उद्योग सब सैकड़ों गुना | Dr Ujjwal Patni #ayodhya

चुपके से ये 6 काम करलो 2024 में Rich होने से कोई नहीं रोक सकता || 6 Tips to Get Rich In 2024

पूरे Ayodhya का भव्य नजारा पहली बार किसी कैमरे पर Manish Kashyap ने NMF News के माध्यम से दिखाया

Video No.1 Rank kaise kare || 100% Seo kaise kare || YOUTUBE SEO 2024 Step By Step Tutorial

UPSC Coaching SCAM Exposed | UPSC Coaching Dark Reality | Sandeep Maheshwari Vs UPSC Coaching Mafia

🤫10 मिनट में ₹500 कमाओ✅ ! Facebook Se Paise Kaise Kamaye ! Facebook Profile Se Paise kaise kamaye

YouTube💌 Love Letter 🤩 इस गरीब का Google से आया AdSense Pin😍| YouTube Offline Class

😱 @ShivaniKumariOfficial ने यूट्यूब की पोल खोल दिया | YouTube Money 🤑

एक वीडियो कॉल से ज़िन्दगी कर देते हैं तबाह | 5000 शिकार, 5 गिरफ्तार | Video Call Sextortion Scam

Coaching Reality EXPOSED | By Sandeep Maheshwari | UPSC NEET JEE

12वीं FAIL साइबर ठग अरेस्ट, जामताड़ा से ट्रेनिंग, विदेशियों से करोड़ों की ठगी

Internet से पैसा कैसे बनेगा YouTube Wale Baba बताएंगे @TechChampionSupport86| Josh Talks Hindi

अयोध्या राम मंदिर किस Topic पर Video Viral करे || Top 12 Trending Topic Ideas on Ayodhya Ram Mandir

Creators के साथ Scam नहीं होने दुंगा | Youtube Paid Monetization Right or Wrong | Fake Monetization

🤫 सिर्फ 30 दिनों में 1M Followers ✅| Instagram Followers Kaise Badhaye | Instagram Followers 2024

15 minutes में OPTION TREDING सीखे In Hindi || How to learn and Earn Through Option Trading

अयोध्या में मोदी जी का भारी अपमान?गुजरात वाली 108 फीट का अगरबत्ती मंदिर में नही जलेगा?

Ayodhya dharmpath marg latest update/Ayodhya rammandir pran pratishtha/22जनवरी2024 प्राण प्रतिष्ठा

Ayodhya में प्रज्वलित की गई 108 फीट लंबी अगरबत्ती! 21 दिन तक पूरे अयोध्या को महकाएगी

First Look Of Ayodhya Ram Mandir From Inside | राम मंदिर के प्रथम दर्शन | Ram Mandir Pran Pratishtha

लॉरेंस बिश्नोई अयोध्या राम मंदिर में करेगा सोने का मुकुट दान अब बनेगा लॉरेंस गैंग पर नया फिल्म

Ayodhya में Babri मस्जिद तोड़ने का एक-एक मिनट का प्लान ऐसे बना? Ram Mandir | Yogi | Narendra Modi

राम मंदिर पर आर्मी के युवाओं ने राम मंदिर पर किया ऐसा ऐलान! || Loksabha election 2024

राम मंदिर के उद्घाटन को लेकर गोदी मीडिया से भिड़े मोहित शर्मा

राम मंदिर उद्धघाटन से पहले भड़के ब्राह्मण | 2024 मोदी चूक जाएंगे ? Loksabha Election | Rahul Gandhi

Ram Rajya After Ram Mandir? (Or Same Same) | #pranpratistha | Akash Banerjee

😱 70 साल बाद आपकी YouTube लाइफ कैसे होगी? | YouTube Wale Baba

Ayodhya Ram Mandir Trap/SCAM | VIP PASS | Prashaad at Home Delivery

Ram Mandir Darshan: Witness the Divine Beauty | Jai Shree Ram 🚩🙏

राम मंदिर से होगा अब Creators को Earning और Growth का फायदा || Top 5 Content Related to Ram Mandir

ChatGpt से 750 Rs /Per Day Earn करे | How To Earn 750Rs Daily Through ChatGpt | Earn Using Chat GPT

😭😭 काला दिन ⚫My Black YouTube Day | YouTube Wale Baba ❌🤬

Youtube Channel Kaise Banaye | YouTube Se Paise Kaise Kamaye | Youtube Par Channel kaise Banaye

😭 आज के बाद वीडियो बनाना बन्द ❌ ! Fake YouTube Wale Baba🤬

सावधान ! राम नाम पर हो रहा बड़ा स्कैम, Scam on Ram Mandir

Earn Money by Uploading Photos (₹85,000/Month) | Make Money with Facebook Photo Uploads 🤑 | Facebook Bonus

Get 5000 Followers for Free! Every Child Will Earn Money with Facebook 🤑 | How to Increase Facebook Followers

Tears in Eyes, Proof in Hands: This Student Going to the Army Shatters All Stereotypes!

OMG 🔥Selling PDFs for Passive Income : PDF Bechkar Kamaai Kaise Karein?

Business Mastery Series Episode 39 | Sandeep Maheshwari Guides You to Success | Hindi

अयोध्या राम मंदिर प्राण प्रतिष्ठा से पहले धरने पे हिन्दू संत ? 2024 Loksabha Election | Congress BJP

अधूरे मंदिर का उद्घाटन गलत | Modi पर भारी पड़े 4 शंकराचार्य | Analysis by Pragya Mishra

EVM आंदोलन हुआ बेकाबू Modi-Shah घर से गायब ! Public Opinion | congress

Ayodhya’s Yadavs Make a Big Start Concerning PM Modi! Lok Sabha Elections 2024 Insights

College Student हूँ, मम्मी ने उधार लेकर 74000 दिए” Bada Business | Vivek Bindra | Sandeep Maheshwari

Maldives Vs Lakshadweep पर Modi ने कैसे जोड़ दिया भारत? इस भाई ने समझाया Maldives India Conflict

सड़क पर उतरे हजारों छात्र, ये लकड़ा नींद उड़ा गया! खूब हो रहा वायरल

Seema Haider पर जो कोई ना कह सका वो Bageshwar Baba ने कह दिया ! | Dhirendra Krishna Shastri | Live

Earning वाला Blog कैसे बनाये? Step by Step 🔥🔥 | How to Create a Make Money Blog Full Guide

श्री राम नगरी मनीष कश्यप LIVE ।। मंदिर से कैसे क्षेत्र का विकास होता है एक बार अयोध्या आकर देखें

Earn Rs.1,00,000+ Per Month Without investment, How To Make Money Online, Earning App Gromo For Free

Ayodhya Ram Mandir: Hansraj Raghuwanshi का ये गीत आपको भी सुनना चाहिए | R Bharat

बुरी फंसी मोदी सरकार? सड़क पर उतरे हजारों छात्र तो ये क्या हुआ

यशोदा बेन पहुंची अयोध्या, मोदी मंदिर उद्घाटन पर बैन? #rammandir #ayodhya

अयोध्या में Modi की रैली फ्लॉप साधु संतों ने किया भारी विरोध ! Public Opinion | congress

EVM हैक करके सुप्रीम कोर्ट के वकील के सामने लाइव दिखाया तो देखिए क्या हुआ

Thumbnail kaise banaen ✅ | Youtube Thumbnail kaise banaye | How to make Thumbnail for Youtube 2024

Trading Scam से सावधान ! महिला ने गँवाए 4.56 करोड़ रुपये ! साइबर पुलिस की मदद से 3.8 करोड़ हुए वापस

Your Service is Due SCAM ! अगर आप भी ऐसा करते हैं तो हो जाएँ सावधान !

Unmasking Scams: 3 Warning Signs | Sandeep Maheshwari Exposes #StopScamBusiness

Blog Design 5 Minute में Khabarfactory24.com जैसा | Fixing Ad Limit, Search Console, & 404 Issue Fix

Passport Apply Online 2024 – Mobile se passport kaise apply kare | Passport step by step process

Free ai image generator website | adobe firefly kaise use kare | Best photo editing ai website free

Without Money 🔥 How To Make A Free Website | Free Website Kaise Banaye | Free Hosting ke Saath

Opposition’s 2024 Strategy: Will India Face Another Partition? Exploring North vs. South Divide

मालदीव मामले में भारत के साथ आया इजराइल !! गिर सकती है मालदीव की मुइज्जू सरकार !! by Ankit Sir

अचानक अयोध्या पहुंचा सैकड़ो गिद्धों का झुंड ,जटायु देख चौंकी दुनिया | Group Of Vulture In Ayodhya

Lakshadweep Tourist Places | Lakshadweep Tour Budget | Lakshadweep Tour Guide | Lakshadweep Vlog

मालदीव के बारे में क्या बोले खान सर? | क्या मालदीव समुंद्र में डूब जायेगा? जानिए सब कुछ विस्तार से

Indian Navy आधे घंटे लेट होती तो लक्षद्वीप हाथ से निकल जाता|Lakshadweep| Aasan Bhasha Mein

क्या लक्षद्वीप Tourism में Maldives को टक्कर दे पायेगा? इसके लिए हमको ये करना चाहिए! | Khan Sir

Maldives India Conflict Explained |मालदीव का भारतीय इतिहास | Narendra Modi | Lakshadweep | Rj Raunak

किसे हो रही है Ram Mandir से परेशानी? | Tejasvi Yadav | Jitendra Awhad | Rj Raunac

Ayodhya Ram Mandir History | अयोध्या विवाद की पूरी कहानी| Ram Mandir Inauguration | RJ Raunac

Instagram से 25,000 Per Month Earn करे || How To Earn 25,000 Rs/Per Month Through Instagram In 2024

23 Money Making Ideas for year 2024 also | Recap of 2023 | Hrishikesh Roy

ChatGPT का use करके Lifetime Earning के 12 extremely powerful तरीके #hrishikeshroy #chatgpt

2024 में Affiliate Marketing का सबसे Genuine and Effective तरीका with Hrishikesh Roy for beginners

AI Images की Blogging | Secret Blogging Strategies | Keyword Research and SEO #makemoneyonline

AI Image से Affiliate Marketing का top secret | Affiliate Marketing on Pinterest #affiliatemarketing

Online Trading Scam से सावधान !! युवक ने गँवाए 2.3 करोड़ रुपये ! Cyber Crime News Alert

Famous Actor Rakesh Bedi Falls Victim to Scam: Impersonated Army Officer Dupes Him – Watch Live!

Earn 5-13 Lakhs by Getting Pregnant? Unraveling the All India Pregnant Job Scam | CyberCrime Busts 8 in Nawada, Bihar

Decoding 91Club, TC Lottery, ColorWiz, MantriMall, LulluMall, BigDaddy: Are Color Prediction Games Real or Fake?

Fear No One | Empowering Wisdom by Sandeep Maheshwari #StopScamBusiness

🔥Heico, Dominos Earning App | Best Earning App | Online Paise Kaise Kamaye Best online Earning App

लापता Scam – गुमशुदा की तलाश, साइबर अपराधी गिरफ्तार, Missing Person Scam

J&K में Online Survey के नाम पर करोड़ों की ठगी, सवालों के घेरे में Influencers, Money Double Scam

घर से करें काम पेंसिल पैकिंग करके कमाएँ 30,000 रुपये हर महीने, Natraj Apsara Pencil Packing Job Scam

पत्नी से मारपीट के आरोप, Dr.Vivek Bindra पर FIR, संदीप माहेश्वरी के सवालों को इग्नोर करने की कही बात

Grand Event with 600 Creators! YouTube Creators Collective Hosted By Amresh Bharti Ft. YouTube India

Passive Income से 50,000 Rs Earn करे | Top 10 Unique Passive Income Ideas | 10 Passive Income Source

Transform Your Life in 2024: 5 Steps to Make it the Best Year Yet | Motivational Video

Earn करे 30K Rs Per Month Graphic Designing से || Graphic Design Career In India 2024 Complete Guide

Earn Daily ₹500 Creating Thumbnails with Canva | How to Make Money with Canva | Canva Tutorial 2024

MLM Scam Exposed | By Sandeep Maheshwari #StopScamBusiness

Facebook पर ऐसे आता है लाखों Views | How to Viral Facebook Video | Facebook Video Viral Kaise Kare

12 साल का बच्चा Facebook से कमाता है ₹3 लाख/महीना | How To Earn From Facebook ?

Grow Your Facebook Page in 24 Hours 😱 | How to Increase Views on Facebook | Tips for Viral Facebook Videos

✅ Facebook Page Vs Profile: Which Earns More Money and Goes Viral Faster? 🤑 | How to Make Money on Facebook

Best Black Friday Web Hosting Deals 2024 🔥 | Which Hosting is Best for Your Blog?

5 SHOCKING Free HOSTING and Free DOMAIN Websites in 2023 | Free WordPress Hosting

News Website Web Hosting at Just ₹19 | Cheap Web Hosting for WordPress | Best Indian Cloud Hosting
Best Hosting for High Traffic Blog? – How to Choose the Best Hosting for My WordPress Blog?

Best Hosting in India (2024) 🔥 | Top Hosting for WordPress, eCommerce [3 Years Experience]

Best Hosting for WordPress in India | Top Indian Web Hosting 2024

Cheap Hosting for WordPress | Best Affordable Hosting Solutions

Best Hosting News Blog के लिए 🔥 🔥 | Best WordPress Hosting For High Traffic Blog

Best Web Hosting for WordPress 2024 (Top 6 Companies Compared)

Best WordPress Hosting for 2024 & Beyond by Code With Harry

Motivational Speakers की कमाई का असली सच? |Sandeep Maheshwari|Vivek Bindra|#StopVivekBindra

YouTuber Sandeep Maheshwari ने Bada Business वाले Vivek Bindra पर किस Scam का आरोप लगाया ? | News

कोई 1 Instagram Page Start करो Daily 1000 Earn करो || How To Earn Through Instagram Page In 2024

Sandeep Maheshwari ने #StopVivekBindra Video बनाकर कौन सा बड़ा ऐलान कर डाला? | Social List

Truth Behind #stopvivekbindra | Vivek Bindra Scam | Deepak Roy | Sandeep Maheshwari

10 DAY MBA FROUD START | Stop Vivek Bindra #stopvivekbindra @SandeepSeminars @MrVivekBindra #vivek

Victims की कहानी Scam करोड़ों का? | Legal Meet with Advocates | Dr. Amit Maheshwari

क्या विवेक बिंद्रा को फसाया जा रहा है? 😳 – Vivek Bindra Controversy || Rajendar singh

Why #StopVivekBindra Unveiling 8 BIG Claims by Sandeep Maheshwari and the Truth Explained by Peepoye

Sandeep Maheshwari and Dr. Vivek Bindra: Navigating the Controversy, Unraveling Scam Allegations | #StopVivekBindra

Sandeep Maheshwari Responds to Dr. Vivek Bindra – Unveiling the #StopVivekBindra Scam Controversy

The Future of MLM in India: Sandeep Maheshwari vs. Vivek Bindra | #StopVivekBindra Movement

Stop Vivek Bindra | #StopVivekBindra | Sandeep Maheshwari Exposed Vivek Bindra

बिजनेस सिखाने वाले Vivek Bindra ने अपने Bada Business को लेकर क्या खुलासे किए? Sandeep Maheshwari

Halt the Controversy: #StopVivekBindra Movement Takes a Stand

Responding to the Clash: Vivek Bindra’s Reply to Sandeep Maheshwari | Sandeep Maheshwari Vs. Vivek Bindra

Stop Vivek Bindra #StopVivekBindra Sandeep Maheshwari Vs Vivek Bindra #sandeepmaheshwari

Holding Accountable: Stop Vivek Bindra Exposed by Sandeep Maheshwari #StopVivekBindra

500 करोड़ का Scam या Genuine Business ? Vivek Bindra सही या Sandeep Maheshwari | SAGAR SINHA

Sandeep Maheshwari vs Vivek Bindra The End ! Stop Vivek Bindra Video ! #StopVivekBindra

Unraveling the Controversy: #StopScamBusiness with Sandeep Maheshwari and Vivek Bindra

Unveiling the Real Scam: The True Reason Behind the Maheshwari vs. Bindra Feud | #TrashTalks Ep-2 Exposed

आर या पार – संदीप माहेश्वरी का पलटवार #StopVivekBindra @SandeepSeminars

Vivek Bindra ने Sandeep Maheshwari पर Biggest Attack/Janeman लिख Video बनाया तो ये हुआ, Naman Sharma

Stop Vivek Bindra #StopVivekBindra | By Sandeep Maheshwari

Earn 1 Crore Per Year 💸 5 High Demanding Freelancing Skills For Students | Earn Money Online

Explore Top Choices: 7 Best Google AdSense Alternatives with Instant Approval for Blogging Success

Get Google AdSense Approval in 7 Days: Proven Strategies for Quick Approval

Revolutionize Your Design: 7 AI Tools Every Designer Needs to Know About!

क्या आप इन AI Tools का इस्तेमाल Digital Marketing में नहीं कर रहे ? Ai tools for Digital Marketing

Unlock Earning Potential: Free Blogger Earning Script Works on WordPress Tool | Secure Google AdSense Approval

Optimize Your SEO: Unveiling the SEO Formulae on Google Sheet | Google Sheet for Digital Marketers Course #1

Earn 1 Lakh Per Month Work From Home – Through Digital Marketing Agency In 2024 || Make Money Online
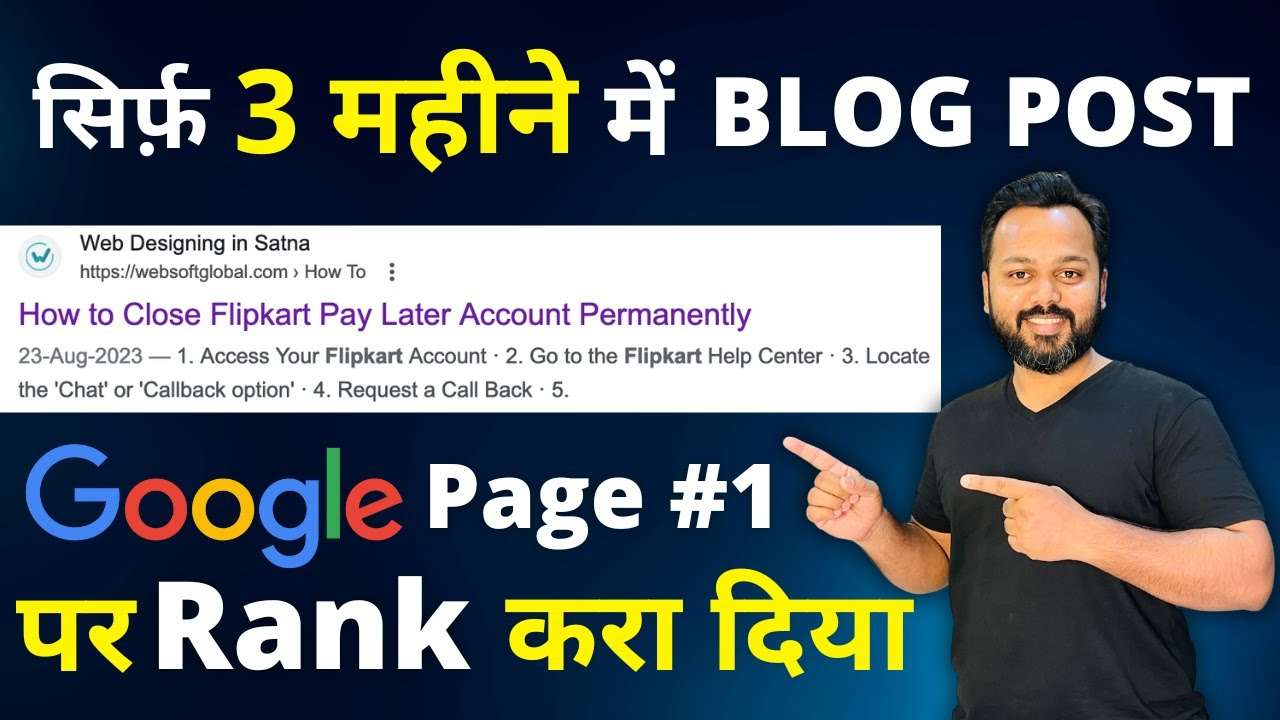
Unlock Success: How to Rank Your Blog on Google Page #1 | Blogging Tips for Beginners | Secret Blogging Strategies

The Unveiling Truth of Sandeep Maheshwari & Vivek Bindra Fully Exposed! Who Holds the Right Perspective? @ArbaazVlogs

Overcome the Top 5 Fears Holding You Back from Success | Best Motivational Video 2024 | Sonu Sharma
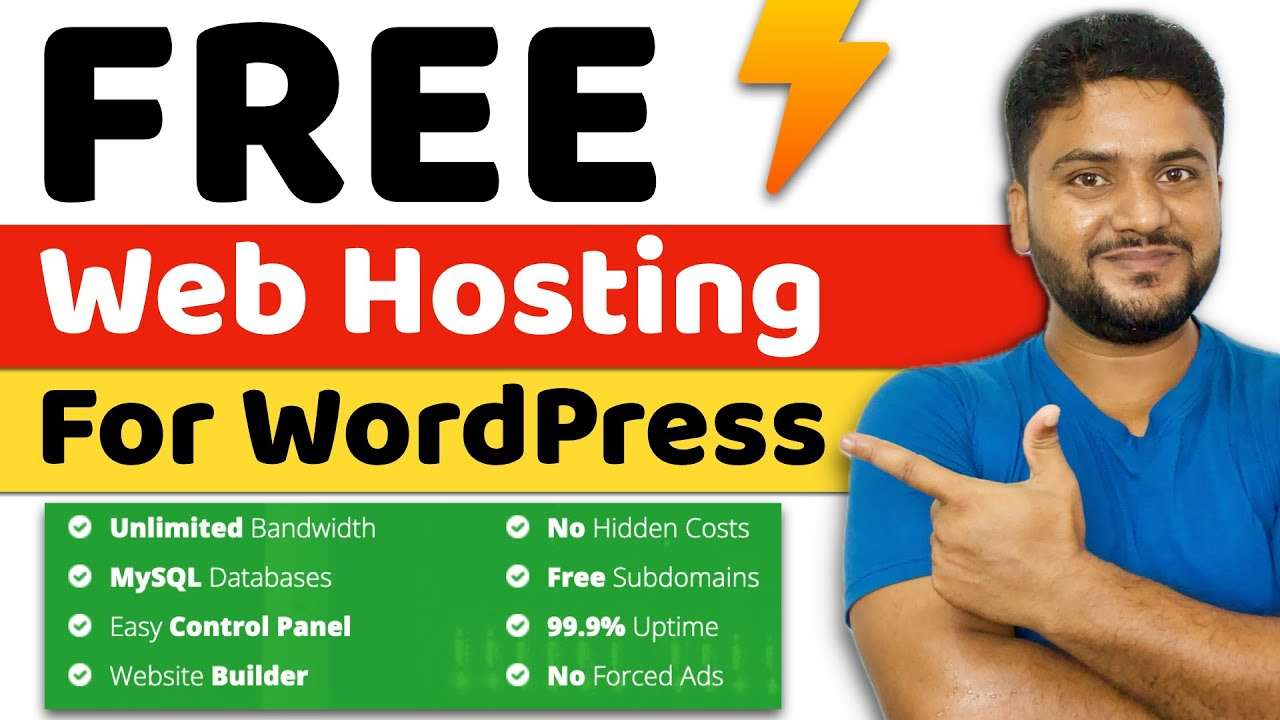
Unlock Cost-Free Hosting Solutions: FREE Web Hosting for WordPress Websites

How to Write SEO Friendly Meta Title and Description using AI-By Website Learner

How to Speed Up Your WordPress Website (in just 5 steps)-By Website Learner

Vivek Bindra ने Sandeep Maheshwari पर Biggest Attack/Janeman लिख Video बनाया तो ये हुआ| Social List

Sandeep Maheshwari ने YouTube में लिखीं Vivek Bindra की गलतियां, क्या क्या बोला? | Social List

Vivek Bindra Exposes Sandeep Maheshwari? Decode with 14 Key Statements | Peepoye

Breaking News | Biggest Twist in Sandeep Maheshwari Vs Vivek Bindra Case | Praveen Dilliwala
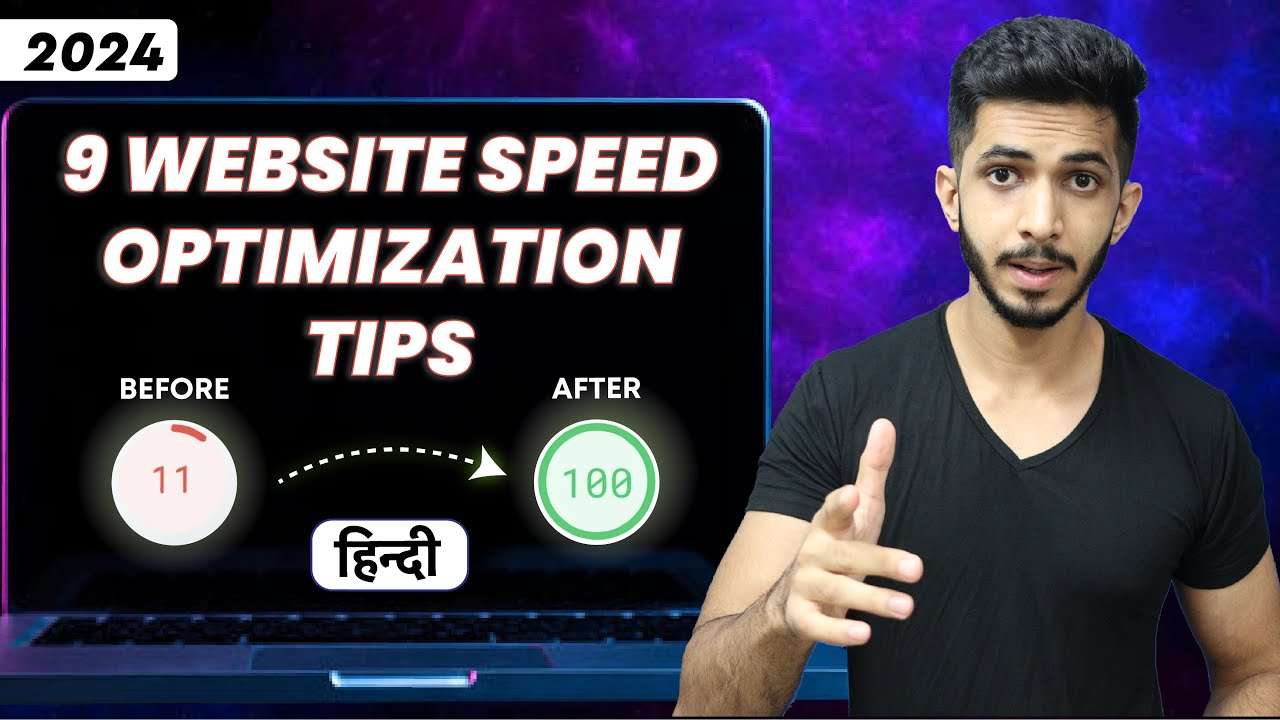
9 Website Speed Optimization Tips हिन्दी (2024) 🔥 || How To Increase Website Speed? 🤔

AI से लिखे Content Rank नहीं होते ! सच्चाई क्या है ? Does AI content Rank on Google? #aiwriting

कौन सही कौन गलत? Dr.Vivek Bindra Replied to Sandeep Maheshwari, Biggest Controversy Big Scam Exposed

Gemini – Google’s fake AI EXPOSED | ChatGPT killer by Google | Abhi and Niyu

Is Digital Marketing Still a Good Career in 2024 ? | Career Guidance by Umar Tazkeer

इस Topic पे Blogging Start करदो फटाफट – Prompt Library – ChatGPT Prompts #chatgptprompts

लोन लेकर बिहार के लाल ने विवेक बिंद्रा से लिया कोर्स! करोड़पति बनने के चक्कर में बन गया खाक पति!

Money Request SCAM on UPI Amazom Frod

How To Get Your Website in Google Discover| Google Discover SEO

क़िसमें ज़्यादा पैसा? YouTube Vs Blogging | Mahatma Ji Technical & Pavan Agarwal! @SatishKVideos

Google Adsense भूल जाओगे 100$/Day | MonetizeMore Review |Best High Paying Google Adsense Alternative
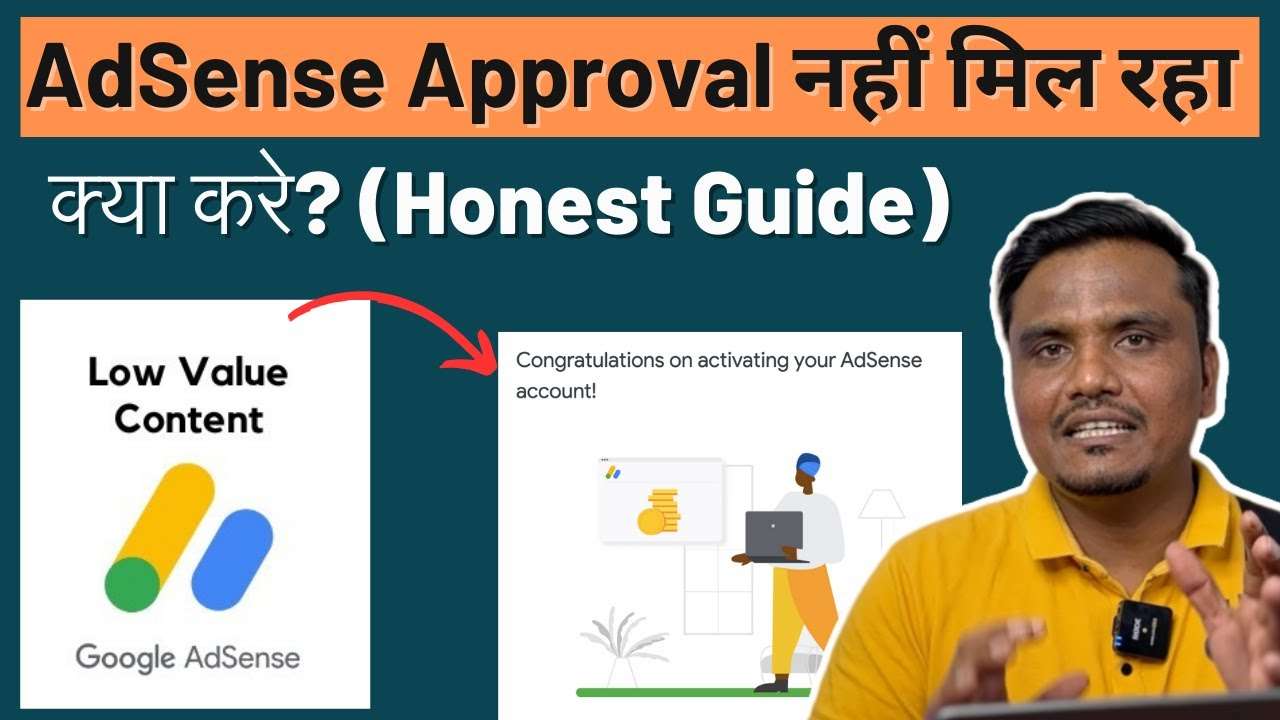
Google AdSense Approval कैसे मिलता है? (Honest Guide) | Google AdSense Approval 2024

How to Earn Money New Blog ||Secret Blogging Trick ||Earn Money Google Adsense

How a Female Blogger Making $5000 Per Month Without Google Adsense | @SatishKVideos

Blog के लिए Image कहाँ मिलता है? | Best Ways to Find Photo For Blog Post

Google Adsense Approval गारंटी के साथ | 10 Points for Adsense Approval in 2024

15 दिनों में Google AdSense Approved 🔥🔥 | Adsense Approval Kaise Le?
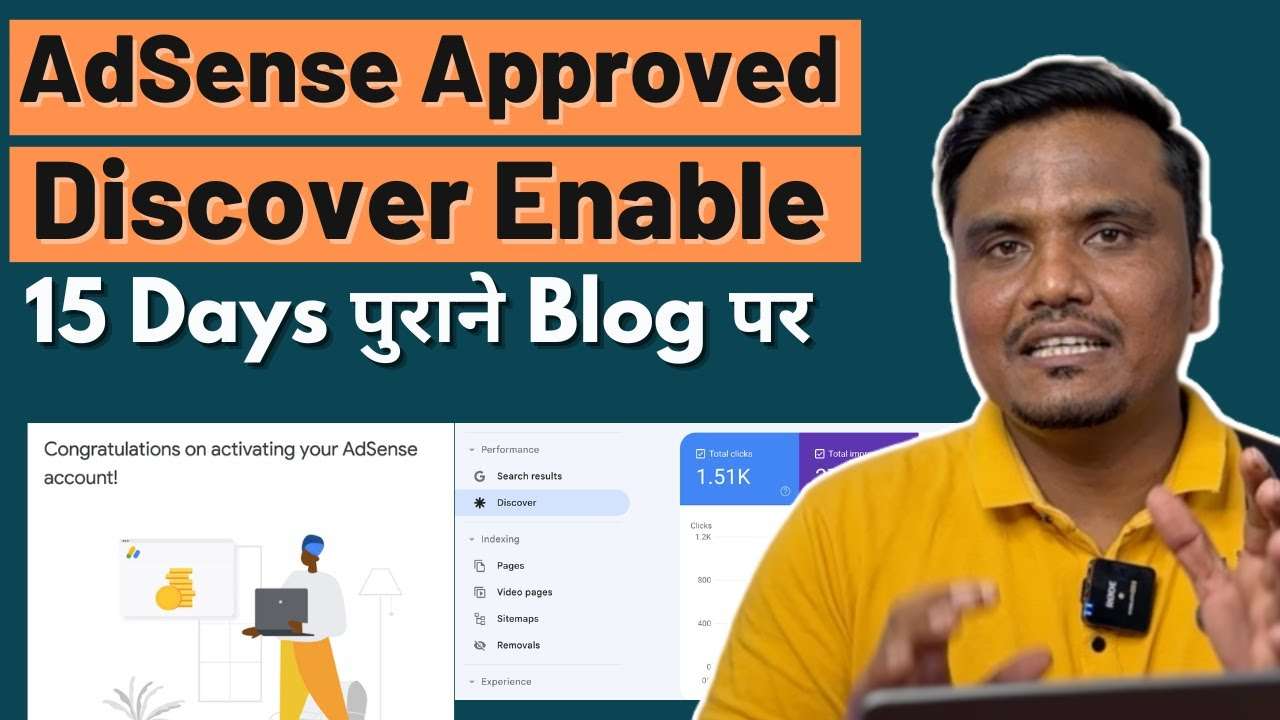
AdSense Approval कैसे मिला 15 Days Old Blog पर? | How to AdSense Approval Fast on New Blog?

Traffic की Tension ख़त्म 🚀 | How to Get Your Website in Google Discover | Google Discover Web Stories

Biggest Controversy | Biggest Program | Biggest Attack – Dr Vivek Bindra

How to write a blog with Chat gpt ChatGPt and Youtuber Killer Goggle Gemini AI @LearnandEarnwithPavanAgrawal
GOOGLE MY BUSINESS SEO 2024 – The Fastest Way to Rank N#1 on Google Maps | GMB Rank #1 On Google

Google My Business Old Profile | Old Google My Business Profile | Google My Business Old Dashboard

What Is Store Code in Google My Business What Is Shop Code in Google My Business By RND Digital

Sandeep Maheshwari Vs Dr. Vivek Bindra – Full Decode! Sandeep Maheshwari and Vivek Bindra Controversy

Sandeep Maheshwari vs. Vivek Bindra: Scam or Misrepresentation? Stop Scam Business

Expose MLM Business I DID A STRING OPERATION ON MLM BUSINESS Model Stop Business Scam

Exposed Dr Vivek Bindra By Sandeep Maheshwari Big Scam Expose Vivek Bindra

Zakir Khan React On Dr. Vivek Bindra Sandeep Maheshwari Controversy 😯 | Dr. Vivek Bindra Exposed

Free Legal Meet for Scam Victim | Big Scam Exposed | Dr Amit Maheshwari

Sandeep Maheshwari vs Vivek Bindra Controversy Explained | Biggest scam exposed | By Virat Sir

Business Course Selling SCAM Exposed |Sandeep Maheshwari Vs Vivek Bindra | Biggest Scam Exposed

Exposing 5 Biggest Scam on Youtube | Sandeep Maheshwari Vs Vivek Bindra | Biggest Scam Exposed

Fake Motivation Exposed Sandeep maheshwari vs vivek Bindra stop scam business

Sandeep Maheshwari VS Vivek Bindra Controversy || आखिर हुआ क्या है पूरा मामला विस्तार से जानिए

COURSE TRAP | BIG SCAM Course Business GURU’s Exposed ft. Sandeep Maheshwari vs Vivek Bindra

आप भी फस जाओगे Sandeep Maheshwari Vs Vivek Bindra| Sach kya hai?| किसने किया है असली scam

I Exposed Vivek Bindra 500 crore scam with PROOF | Thanks to @SandeepSeminars

अब होगा SCAM BUSINESS बंद? रुपया लौटाएंगे VIVEK BINDRA जाने कैसे? #stopscambusiness@SandeepSeminars

Vivek Bindra’s Team Mentally Tortured Him With Proof @SandeepSeminars Sir Please Save Him

Sandeep Maheshwari vs Vivek Bindra Controversy |Mahatma Ji Technical |Amresh Bharti

Sandeep Maheshwari vs Vivek Bindra Big Scam Exposed || Who is Wrong ? Manoj Dey

Biggest Update | Sandeep Maheshwari vs Vivek Bindra | Controversy Explained | Naman Sharma
Stop SCAM Business | Sandeep Maheshwari #StopScamBusiness

Exposed Vivek Bindra By Sandeep Maheshwari | Sandeep Maheshwari EXPOSED a Big SCAM,Reality?

Biggest Update | Sandeep Maheshwari Vs Vivek Bindra Controversy | Biggest Scam Exposed

Sandeep Maheshwari VS Vivek Bindra – कौन सेही कौन गलत ?

Sandeep maheshwari vivek bindra | earn money $100 make a video on sandeep maheshwari vs vivek bindra

Sandeep Maheshwari | Vivek Bindra | Big Scam Exposed? | MrReactionWala

Sandeep Maheshwari Vs Vivek Bindra। Biggest Ever Controversy on YouTube॥🔥 अब आगे क्या होने वाला हैं?

संदीप माहेश्वरी vs विवेक बिनद्रा Sandeep Maheshwari Vs Vivek Bindra कौन सही और कौन नहीं ?

Sandeep Maheshwari Vs Dr. Vivek Bindra | क्या IBC मॉडल एक धोखा है ? Big Scam | क्या है सच्चाई ?

पूरा मामला क्या हैं? – sandeep maheshwari vivek bindra controversy explained – Rajendar singh

Sandeep Maheshwari vs Vivek Bindra Controversy || controversy || Rajendar singh

बिंद्रा हुआ बेनक़ाब | सब IBC को रुपया मिलेगा वापस कैसे Sandeep Sir Vs Dr. Vivek Bindra Controversy

Sandeep Maheshwari vs Vivek Bindra Controversy Explained | Business Model Frauds

Big Scam Exposed by Sandeep Maheshwari | Inside Story of Victim | Dr. Amit Maheshwari

Sandeep Maheshwari And Dr Vivek Bindra Controversy EXPOSED Dr Vivek Bindra Big SCAM? Fake Business Course SCAM?

Big Scam Exposed 😱 By Sandeep Maheshwari and Vivek Bindra Controversy

I ♥️ Support & Stand with Sandeep Maheshwari 🔥@SandeepSeminars Exposed a Big Scam

सबसे बड़ा SCAM करने वाला है DR.VIVEK BINDRA जाने कैसे ?

Biggest Update | Sandeep Maheshwari Vs Vivek Bindra Controversy | Biggest Scam Exposed

Vivek Bindra Vs Sandeep Maheshwari कौन सही कौन गलत ? | Controversy Explained

Sandeep Maheswari And Dr. Vivek Bindra Controversy @SandeepSeminars @MrVivekBindra #viral #short

Sandeep Maheshwari ya Dr. Vivek Bindra | Kaun hai Galat? | Big Scam Exposed #sandeepmaheshwari

Sandeep Maheshwari Vs Vivek Bindra | Be aware | Else you will be finished

Sandeep Maheshwari Vs Vivek Bindra Internal Vs External Motivation By Deepak Daiya

Sandeep Maheshwari vs Vivek Bindra | Controversy Explained | Analysis by Arvind Sir | Naiya Paar

संदीप माहेश्वरी Vs विवेक बिंद्रा | जानिए क्या पूरा मामला? Analysis by Ankit Sir

Sandeep Maheshwari vs Vivek Bindra | Controversy Explained | Rahul Malodia

Sandeep Maheshwari और Vivek Bindra की हुई झड़प! एक-दूसरे पर बरसाए मैसेज

Big Scam Exposed Dr Vivek Bindra by Sandeep Maheshwari

Sandeep Maheshwari Vs Vivek Bindra | Sandeep Maheshwari Controversy | SAGAR SINHA

ChatGPT + Blogging = $4000 | Earn with ChatGPT | ChatGPT से पैसे कमाओ

Bada Business Scam Exposed: Dr. Vivek Bindra Under Scrutiny by Sandeep Maheshwari

Dr Vivek Bindra Exposed by Sandeep Maheshwari!

Unraveling the Controversy: Big Scam Exposed – Dr. Vivek Bindra by Sandeep Maheshwari

BIG SCAM EXPOSED Dr Vevek Bindra | By Sandeep maheshwari.

Big SCAM Exposed Dr Vevek Bindra by sandeep maheshwari ! Fake Guru Culture – Business Model of Indra Ji

BIG SCAM EXPOSED Dr Vevek Bindra by sandeep maheshwari

Sandeep Maheshwari | Big Scam Exposed Dr Vevek Bindra | MrReactionWala

BIG SCAM EXPOSED | By Sandeep Maheshwari #Stopvivekbindra

EP 38 of 100 – Business Mastery Series | By Sandeep Maheshwari | How to sale old Laptop
EP 37 of 100 – Business Mastery Series | By Sandeep Maheshwari | Hindi – YouTube

MY LAST VLOG By Sandeep Maheshwari | Hindi

MY SETUP TOUR VLOG By Sandeep Maheshwari | Hindi

MY FIRST VLOG By Sandeep Maheshwari | Hindi

Karma Karna Seekho – By Sandeep Maheshwari – YouTube
EP 36 of 100 – Business Mastery Series | By Sandeep Maheshwari | Hindi – YouTube
Real Motivation EXPOSED | Sandeep Maheshwari – YouTube

EP 35 of 100 Business Mastery Series | By Sandeep Maheshwari | Hindi – YouTube

EP 34 of 100 Business Mastery Series | By Sandeep Maheshwari | Hindi – YouTube

EP 33 of 100 Business Mastery Series | By Sandeep Maheshwari | Hindi – YouTube
EP 32 of 100 Business Mastery Series | By Sandeep Maheshwari | Hindi – YouTube
EP 31 of 100 – Business Mastery Series | By Sandeep Maheshwari | Hindi – YouTube
EP 30 of 100 – Business Mastery Series | By Sandeep Maheshwari | Hindi – YouTube
EP 29 of 100 – Business Mastery Series | By Sandeep Maheshwari | Hindi – YouTube

EP 28 of 100 – Business Mastery Series | By Sandeep Maheshwari | Hindi – YouTube

EP 27 of 100 – Business Mastery Series | By Sandeep Maheshwari | Hindi – YouTube

EP 26 of 100 – Business Mastery Series | By Sandeep Maheshwari | Hindi – YouTube

EP 25 of 100 – Business Mastery Series | By Sandeep Maheshwari | Hindi – YouTube

EP 24 of 100 – Business Mastery Series | By Sandeep Maheshwari | Hindi – YouTube

EP 23 of 100 – Business Mastery Series | By Sandeep Maheshwari | Hindi – YouTube

EP 22 of 100 – Business Mastery Series | By Sandeep Maheshwari | Hindi – YouTube

EP 21 of 100 – Business Mastery Series | By Sandeep Maheshwari | Hindi – YouTube

EP 20 of 100 – Business Mastery Series | By Sandeep Maheshwari | Hindi – YouTube

EP 19 of 100 – Business Mastery Series | By Sandeep Maheshwari | Hindi – YouTube

EP 18 of 100 – Business Mastery Series | By Sandeep Maheshwari | Hindi – YouTube

EP 17 of 100 – Business Mastery Series | By Sandeep Maheshwari | Hindi – YouTube

EP 16 of 100 – Business Mastery Series | By Sandeep Maheshwari | Hindi – YouTube
EP 15 of 100 – Business Mastery Series | By Sandeep Maheshwari | Hindi – YouTube
EP 14 of 100 – Business Mastery Series | By Sandeep Maheshwari | Hindi – YouTube
EP 13 of 100 – Business Mastery Series | By Sandeep Maheshwari | Hindi – YouTube

EP 12 of 100 – Business Mastery Series | By Sandeep Maheshwari | Hindi – YouTube

EP 11 of 100 – Business Mastery Series | By Sandeep Maheshwari | Hindi – YouTube

EP 10 of 100 – Business Mastery Series | By Sandeep Maheshwari | Hindi – YouTube

EP 9 of 100 – Business Mastery Series | By Sandeep Maheshwari | Hindi – YouTube

EP 8 of 100 – Business Mastery Series | By Sandeep Maheshwari | Hindi – YouTube

EP 7 of 100 – Business Mastery Series | By Sandeep Maheshwari | Hindi – YouTube

EP 6 of 100 – Business Mastery Series | By Sandeep Maheshwari | Hindi – YouTube

EP 5 of 100 – Business Mastery Series | By Sandeep Maheshwari | Hindi – YouTube

EP 4 of 100 – Business Mastery Series | By Sandeep Maheshwari | Hindi – YouTube

EP 3 of 100 – Business Mastery Series | By Sandeep Maheshwari | Hindi – YouTube

EP 2 of 100 – Business Mastery Series | By Sandeep Maheshwari | Hindi – YouTube

EP 1 of 100 – Business Mastery Series | By Sandeep Maheshwari | Hindi

How to Get Google Adsense Approval for Blog in 2023 | Adsense Approval Kaise Le?

₹30 लाख़ में Selling My Blog (Taazatime.Com) 🔥🔥 10 WordPress Hosting Giveaway by @SatishKVideos

₹50 हज़ार/महीने कमायें बिना Video बनाये New Business Idea Without Investment @SatishKVideos

Financial Planning कैसे करें | Money Management by Sagar Sinha

सफलता वक्त मांगती है | Success Motivation | Best Motivational Video by Sagar Sinha

गरीबों पर ही जुल्म होता है, अमीर बनो | फ़िल्मों से सीख | by Sagar Sinha

नौकरी वाले अमीर क्यों नहीं होते | Job vs Business by Sagar Sinha

Social Media Grow करने के लिए 3 Tips | How to Grow Social Media | by Sagar Sinha

Power of Youtubers | सबसे तेज, बढ़ने वाली industry | Big Achievement of My Life | Sagar Sinha

जीवन की परेशानियों को कैसे Handling करें | by Sagar Sinha

Passion Follow मत करो, ज्यादातर लोग भ्रम में हैं | Don’t Follow Your Passion | by Sagar Sinha

मरने के वक्त यही याद आएगा, समझ जाओ | Best Motivational Video by Sagar Sinha 2023

समय बुरा चल रहा हो तो क्या करें | कृष्ण ने क्या कहा था, कर्ण को | by Sagar Sinha

फालतू खर्च बंद करो, बर्बाद हो जाओगे | Stop Wasteful Spending by Sagar Sinha

बीते कल के कर्म ही,आपका आज बनाते है | Best Motivational Video by Sagar Sinha

जो योग्य है वहीं बचेगा | बाज की Motivational कहानी by Sagar Sinha

गरीब ही रहोगे अगर नौकरी करते रहें | Job vs Business by Sagar Sinha


